Welcome To A Feeling for the (Micro) Organisms! ⚠ ️
Now you’ve received your kit please open when you receive it and leave it in sunlight so the testtube taped to the lid of your kit box is exposed to sunlight - this contains your supply of cultured algae and they need sunlight to stay alive! You also need to carefully open the lid and ‘snap’ close it again to allow gases to exchange every few days to ensure they stay healthy and thriving between workshops and hopefully keep the colony going for as long as possible - which will be a nice rewarding goal to aim for I think.
First Session🔬📲
We’ll be going over microscope use in our first session and then doing the moulding element together in session so please leave the moulding till later. In the clip I mention that there will be a moulding video but I think it will be better to do this ‘together’ online. The instruction booklet is then there for future reference. So play with your assembled ‘scope if you can, but dont worry if you don’t have time or are unable to do it for any reason (you don’t need to give a reason!). You can still take part and assemble the scope in the first session or whenever you want.
So just to be clear, if you are taking part in the online workshops, don’t start the moulding process, just familiarize yourself with the kit and process and play with the included paper slides, we’ll do the moulding together!
Click on the YouTube Clips below for introductions to your Foldscope and LabFromAChip kit!
Assembly
PDMS Moulding Guide
Coming soon!
Set mould Slide Preperation & Phone viewing
Overview
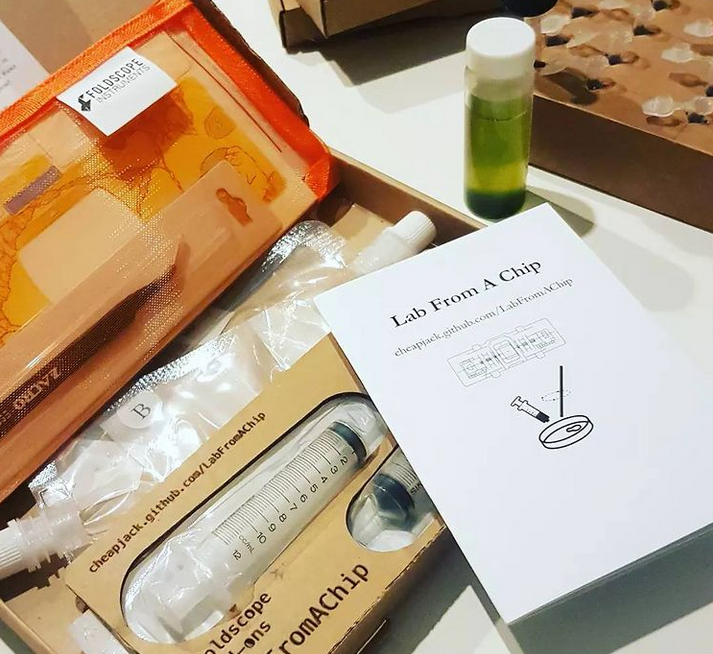
You now have a genuine foldscope classroom kit with some extras to help you experiment in DIY microfluidics with the PDMS silicon provided in the pouches labelled A & B
These extras include the Lab From A Chip instruction booklet to help with the microfluidic elements of the kit for viewing the included live algae samples. Once you receive your kit open it up and make sure your algae sample gets lots of light to help keep them alive!
Preperation: Foldscope Assembly & Testing ⚙️
The first thing to do is to assemble and get used to using your Foldscope. This takes some practice to get everything assembled and be comfortable viewing something.
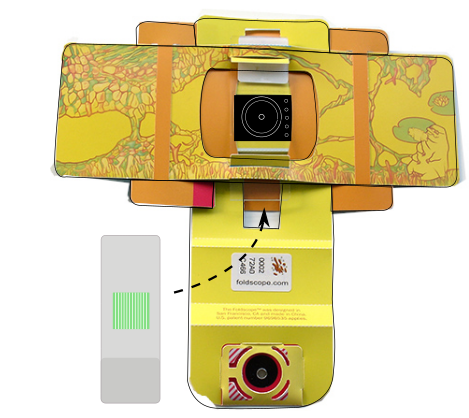
Fully fold out the included colour cardboard net; this contains all the foldscope components that you ‘pop’ out of the net and fold together with the magnetic lens couplers and lenses in the bubble wrap envelope. Unfold the instruction booklet and read both sides and follow the instructions to make your foldscope.
There is an online user guide and series of tutorials on the official Foldscope website and their YouTube channel especially is super helpful.
It takes time to get consistent images with your phone which is what we are aiming for so you can share your images and keep a record of your experiments. You need to practice. Once you get used to it you can make a really simple ‘Quickstart Minimal Build described below if you’re swapping between lots of different slides.
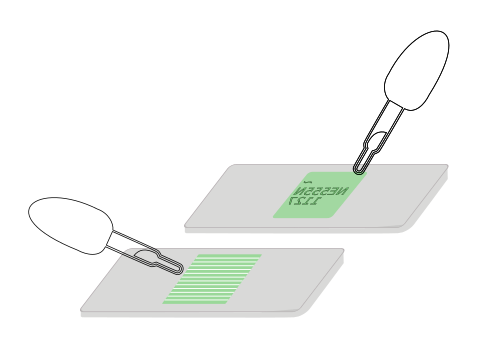
Reference Glass Slide
We’ve included a ready made glass microscope slide in the plastic bag inside the foldscope kit. Use this to ‘test’ your foldscope build and focussing skills so make sure once assembled you watch the glass slide tutorial to help you test the microscope. The slides are labelled and the sample is randomly chosen from an amateur biologist’s collection, typical of the slides you might find in a beginners or children’s microscope kit, but ready to view and some of them even stained to help you see the structures. If you can resolve a clear image of this slide and take a picture on your smartphone camera then you are ready to start making your own slides with PDMS moulds.
You’ll find you need some effort to insert the slide into the frame - but the elasticity of the coated paper of the ‘scope can stretch to accommodate - it’s good to loosen it in this way so that when you insert your custom slide you won’t damage your sample or PDMS slab
We’ve also included a reuseable glass slide for your PDMS work - again inside the clear plastic bag in the foldscope kit but you can experiment with the paper slides included also.
📲
Phone Viewing
We have found that the Phone Viewing Method is the best way to to get images which isn’t really made clear on the official guidance. You can hold it up to your eye and day light but really many of us love sharing our images with a phone so we’d like you to try get used to that.
There’s a helpful video tutorial that’s well worth checking out.
We’ve also found resting on a desk and tilting the phone with the ‘scope attached up to light reflected from your desk or laptop is enough illumination. We suggest phones to do most of our viewing.
It’s worth noting aswell that the original Foldscope Academic Paper imagined the Foldscope could be a xenodiagnostic tool to identify host/parasites in blood and urine samples, or do haemocytometer counts, so viewing such samples at a safe distance with a phone is essential. The foldscope works with glass slides really well in addition to the paper slides included in the foldscope pop-out ‘net’ where you assembled all your foldscope components.
Practice capturing images before you make your first moulds though!
Quickstart: Minimal Foldscope Assembly for Phone Use 🔬📲

The full build as described in the video is best for general use and practice so get used to that first - it’s quite easy to take away the stage later on. This method is useful if you want to swap between many different slides often with your phone.
Open up your foldscope kit and open the instructions. We are going to just build up just the lens stage and focus ramp, a minimal build to look at some algae and make moulds and connect to our phone cameras. Basically you follow Steps 1 - 6 in the main Foldscope ASSEMBLY INSTRUCTIONS, ie the Instructions in the press out net that the ‘scope sits inside, and step 10. of the
This method ignores the blue sample stage that lets you hold and move around the sample on the slide, and just uses the magnetic assembly to hold the slide in place. Then turn over the ‘scope and follow the instructions of phone use to capture images and lift the phone and magnetically attached ‘scope to the light of a window or laptop screen.
Back in Time ⌛
When microscopes were first used people did not know what they were looking at; what was a new organism or an artefact of the lens or a tiny lump of grease from a finger? Early geneticists, long before they imagined ‘seeing’ a gene, would often ban them from the laboratory as unreliable. We’ve come a long way.
In many ways the foldscope puts us back in time as we struggle (and it can be!) to see something. However you’ll be surprised just how much you actually tacitly ‘know’ about what you are looking at. You’ll intimately ‘know’ when you see the algae or a plant cell sample. Unlike laboratory ‘scopes’ your tiny hand movements and fiddling with your phone are very visible, you actually get to ‘feel’ when you are seeing something. This is a bit like Ian Hacking’s idea of ‘Intervening’; we ‘see’ with microscopes partly because of this awareness of how we are interacting with the sample.
Remember, with microscopes we are mainly seeing light being refracted ‘through’ an organism when in our world we only ever really see light reflected off the surface of an object.
Foldscope Ready 🔬
Once you have managed to successfully view the included sample glass slide in the foldscope and got to grips with the phone view, check out your Lab From A Chip booklet.
Again if you are taking part in the online workshops, don’t start the moulding process, just familiarize yourself with the kit and process and play with the paper slides, we’ll do the moulding together!
Below are additional notes to complement the instruction booklet included in your Foldscope kit bag.
Your kit should include, in addition to the foldscope, this inventory of components
PDMS Slide prep 💉💉
You should now be fairly confident you can image things with the Foldscope and take an image with your phone. The next step is making moulds with PDMS silicon. There are two component liquids that when mixed will start to cure into a clear solid. Follow all the instructions in the booklet provided. Below is the summary of what you need to do for quick reference if you dont have your booklet with you.
To safely store and transport the PDMS we’ve had to put them in pouches - each pouch has 4-6ml of PDMS component but it can be awkward to syringe. You only need a small amount to mix in - 0.4ml, but you may end up with air bubbles in the syringe. Hold the syringe vertically with the tip pointing upwards and wait for the bubbles to rise to the surface then gently push the liquid up to the tip - you want it to be as free of air bubbles as possible.
An alternative is to squeeze empty the pouch into another clean narrow container and then syringe up the contents - you can keep the syringe full for other experiments and store it in the packaging or if you are worried about leaks syringe back into the pouch - but dont get them mixed up!
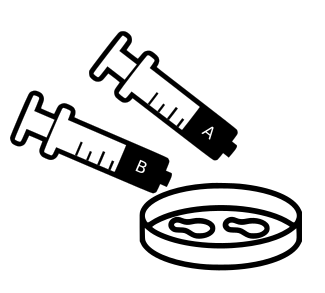
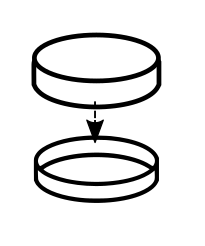
Inject equal amounts (no more than 0.4ml of each) of silicon from syringe A and fixer from syringe B into the ‘floor’ your mini petri dish (it’s the smaller diameter part - the wider diameter part is the lid)
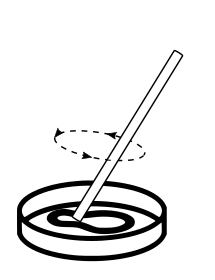
Mix well with a clean spoon or rod to remove bubbles and put the lid on.
Making An Impression 📥⌛
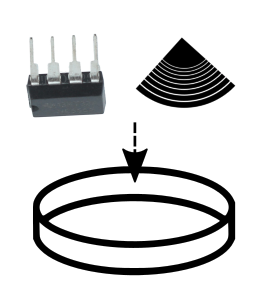
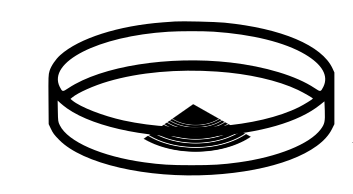
You now need to make an impression in the PDMS mix after mixing. To do this take your black viny fragment and with tweezers gently submerge it grooves facing up in the bottom of the dish. You want there to be a thin film or slab of silicon over the top. Over time the liquid settles perfectly perpendicular so make sure there’s enough to keep the vinyl submerged - but not too much - we are aiming for a thin slab of silicon with an impression in it. Then take the 555 timer chip and bend the metal legs at each corner upwards so that when placing the chip logo down into the PDMS in the dish you end up with a thin film of liquid between the chip surface and the bottom of the petri dish. Press it gently into the mix and you’ll end up with a ‘slab’ of silicon under the chip with an impression of the logo and text of the chip surface - the metal legs keep it less than a mm above the surface of the bottom of the dish. This is tricky, press too hard and your section of PDMS is too thin to remove in one piece with the chip markings once it hardens. The vinyl record grooves face up submerged in the liquid there should be a thin film Usually just resting it in the mix is enough providing you dont drop or move the petri dish too much after.
Now you need to wait and let it set! This can take, depending on thickness, up to 48 hours at room temperature but we’ve found just leaving overnight is fine
Tips
Temperature ⚠🔥 ️
In a warmer place or in sunlight it’s alot quicker, some suggestions of heating to 70 degrees Centigrade estimate fully setting in 2 hours.
We **DO NOT** recommend heating to any temperature you can’t touch safely, like a radiator but you should not leave it unattended. Anything over 70 degrees and your petri dish will melt. In our case also, using the vinyl fragment, it is safest to just leave it in warm room overnight or in direct sunlight. You really **DO NOT want under ANY circumstances to overheat or burn your vinyl fragment**. Vapourising or burning vinyl (150 degrees and up) can release chlorine fumes that even in tiny amounts inhaled can be extremely dangerous.
Other Techniques
You can of course make more impressions in other containers with the A & B mix.
While you wait practice with your foldscope and experiment viewing your algae and other things without your PDMS slab. The paper slides and plastic clear coverslip stickers provided also are worth experimenting with.
Bubbles
There is another step when making microfluidic moulds, making a vaccuum in a degassing chamber to remove any bubbles. For us this is too difficult; although there are plenty of nice DIY vacuum chamber designs out there, This DIY chamber is our favourite but we’ve found you can get ok results without this, the bubbles tend to leave naturally and don’t reallly affect our results as we don’t mind a few bubbles in our images, they might be intersting objects for the algae to swim around.
Removing and Placing our PDMS slab🥢
After leaving your ‘slab’ of PDMS in the petridish overnight we need to carefully remove it. So we need to carefully remove the fragment from the mix. Now cut, preferably with a scalpel or very sharp fine knife, (sorry we can’t include that) the ‘slab’ with our impressions in them and very carefully scrape it from the dish surface with a tiny flathead screwdriver then lift it with your included tweezers.
Now carefully place it impression down onto the glass slide. If it breaks (which it often does!), dont worry! get what you can onto the slide.
Tip
Always be making extra slides for next time! The chips and vinyl can be re-used, just peel out the unused silicon. You may want to find other petri dishes or similar containers
Placing Our Algae in Our PDMS Slide🐛
Get your disposable micro-pipette and capture a drop of algae, being careful not to spill the remaining algae culture.
Use the micro disposable pipette to inject a drop of the algae suspension onto the slide and then with tweezers place your PDMS slab on top. You can also try letting capilliary action pull the liquid and our algal friends into the grooves into the gap between the tiny impressions of the chip surface markings or the vinyl channels and the microscope slide.
Now carefully add a cover slip sticker over the top to ‘trap’ the liquid and slab.
Fixing to the foldscope.
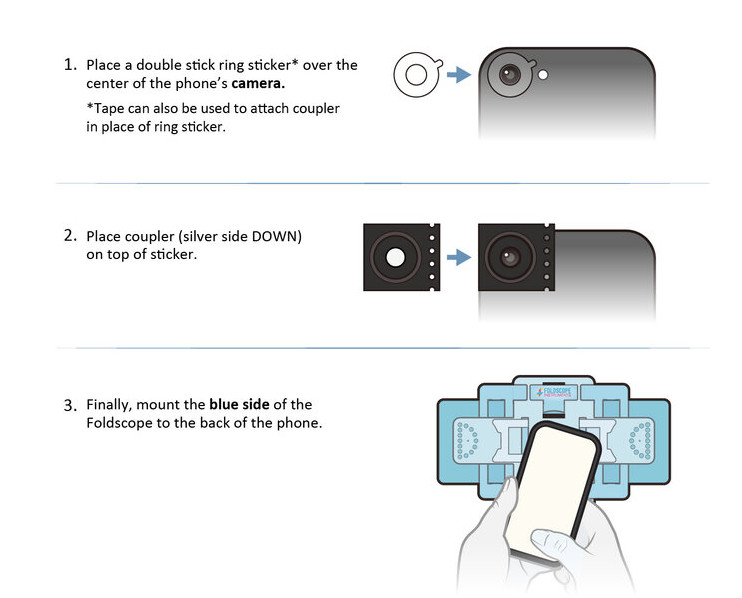
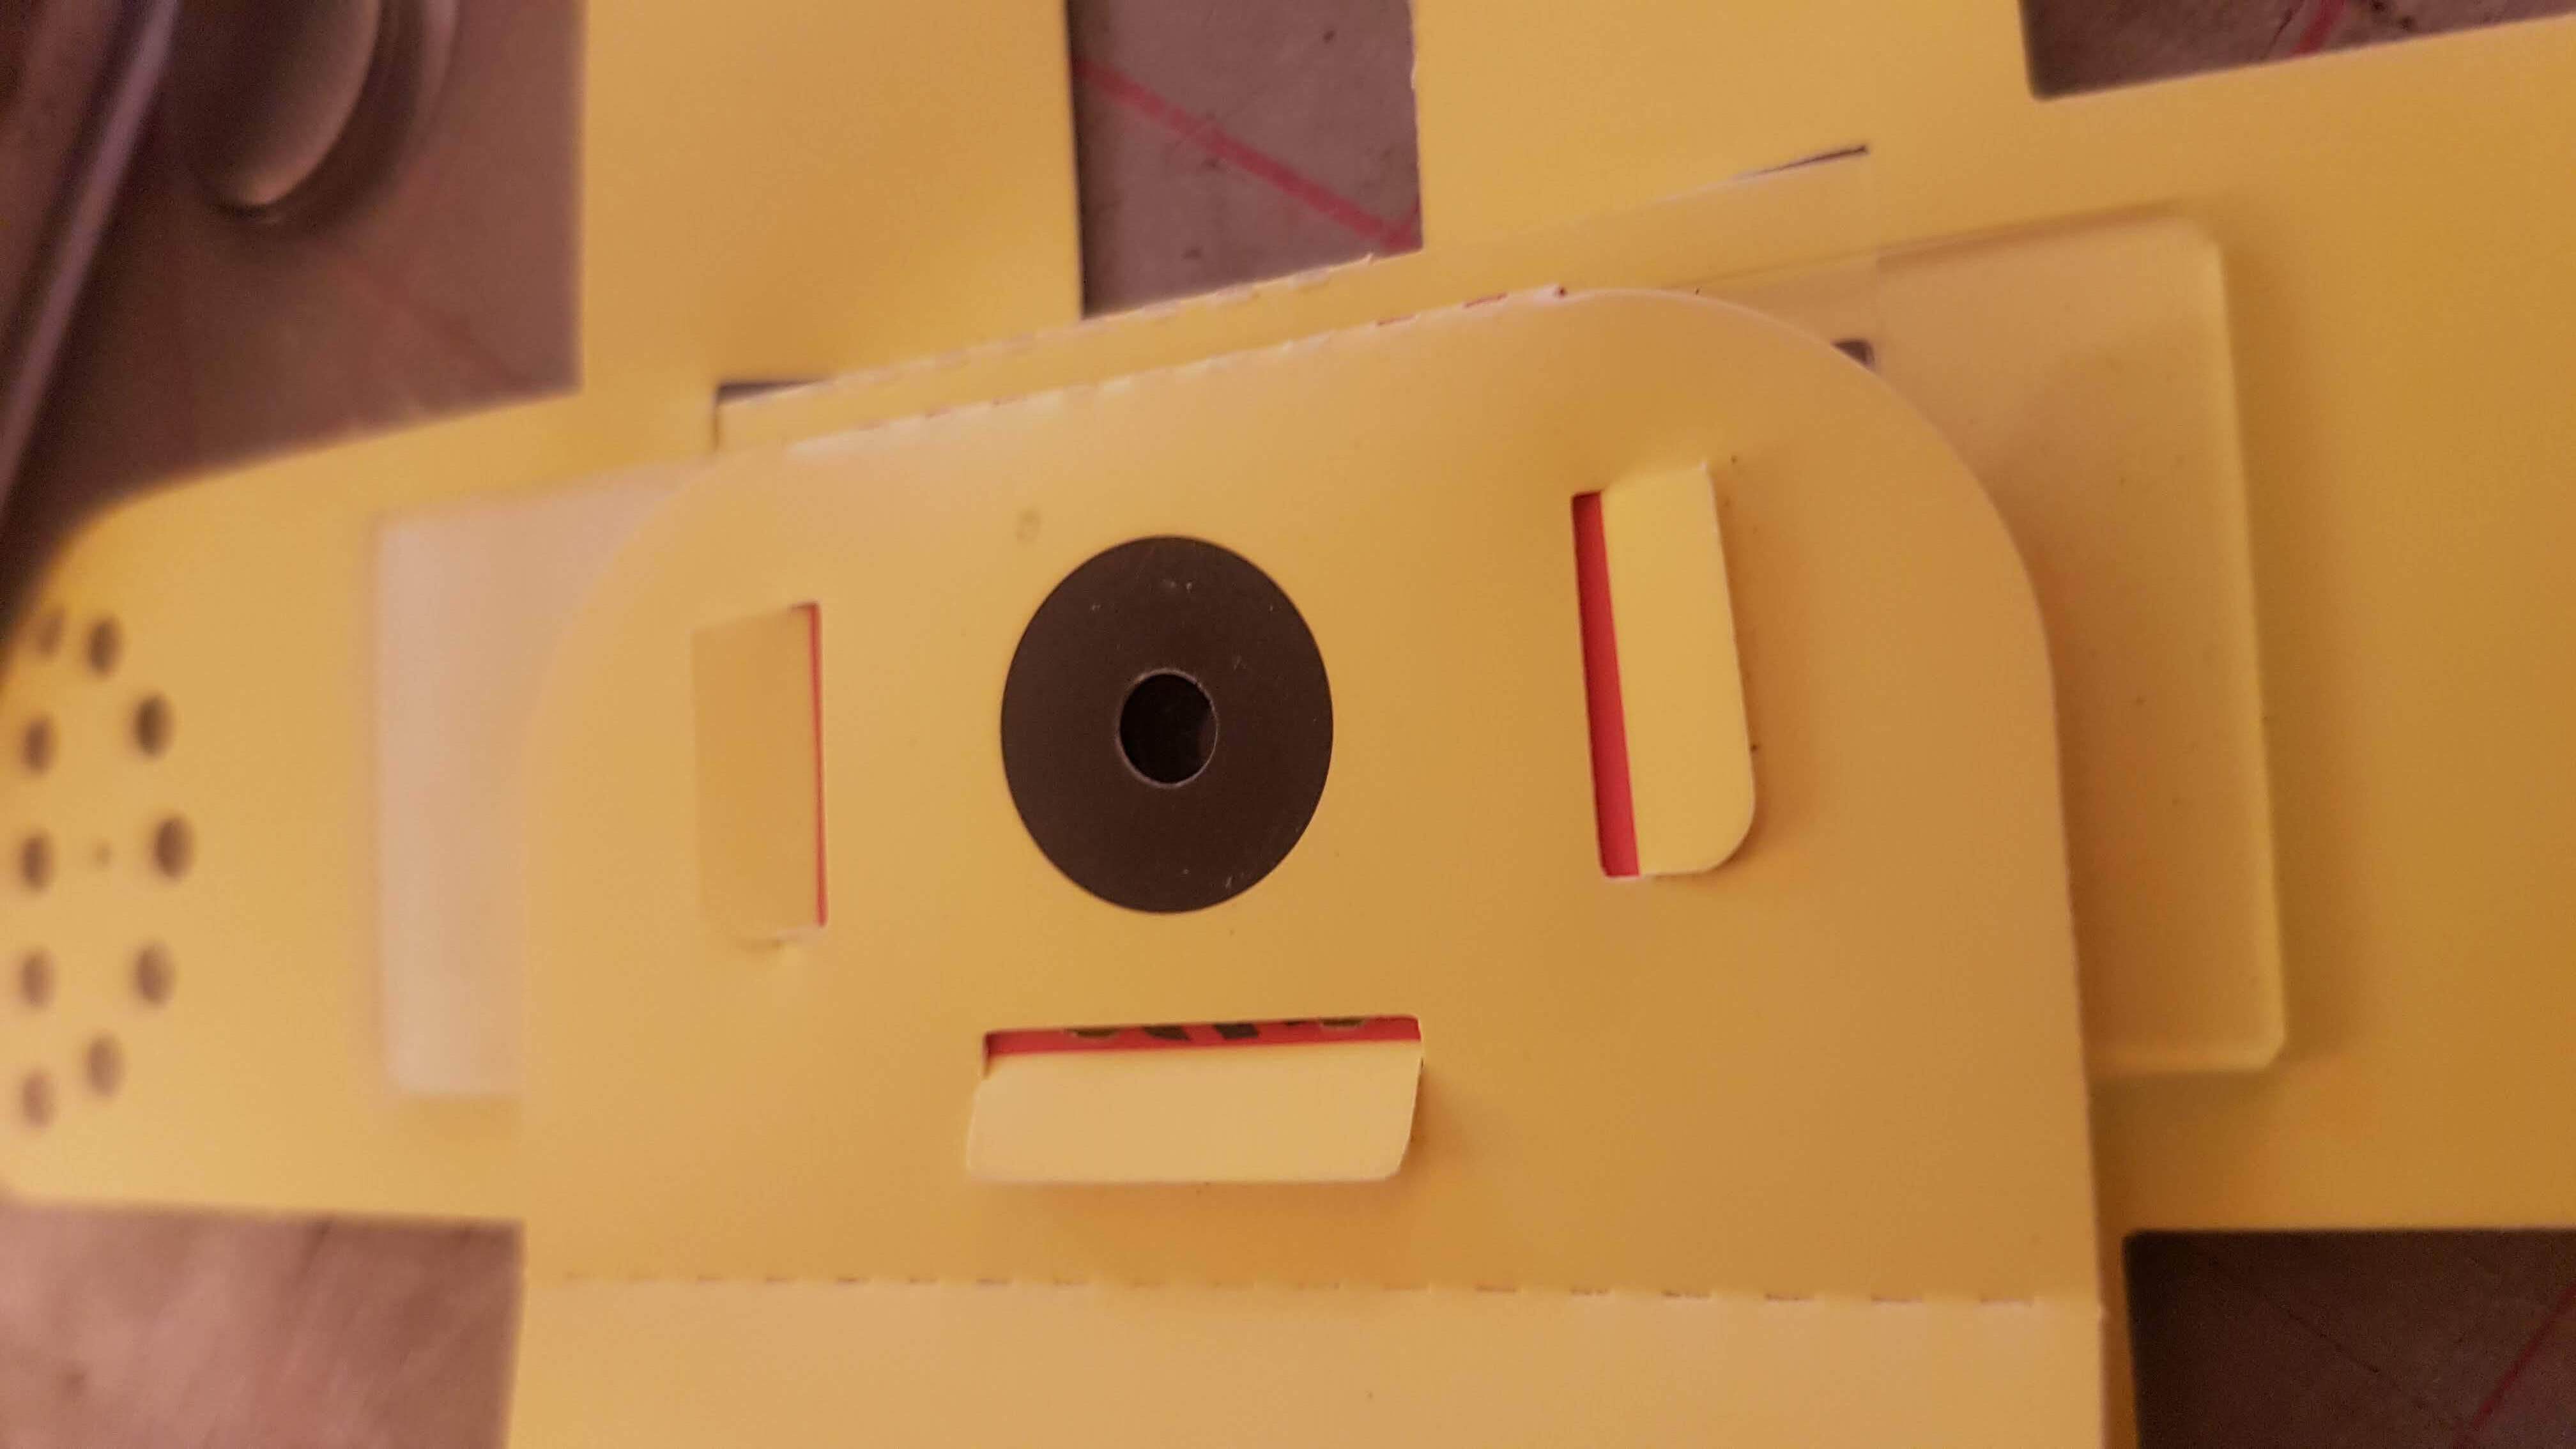
You want the cover slip on the top of your slide or the slab to face the ball lens on the yellow underside of the ‘scope. You can unfold the magnetic section and then when you can see your sample is over the lens, let it snap back and this is often enough to keep your sample in place when viewing
You can also use it without the full foldscope frame; a minimal setup for use with the phone view as below
Fixing more securely
You can insert it more securely than in the minimal Foldscope build following in diagram above
Make sure you have got used to inserting and securing a glass slide into the Foldscope. When first doing it it’s really difficult, the Foldscope coated paper is surprisingly resilient; you’ll need to stretch the slots by inserting and removing a clean slide in and out of the slots of the paper platform so you can move it around easily to find and focus your slide and PDMS slab. It takes practice and some skill.
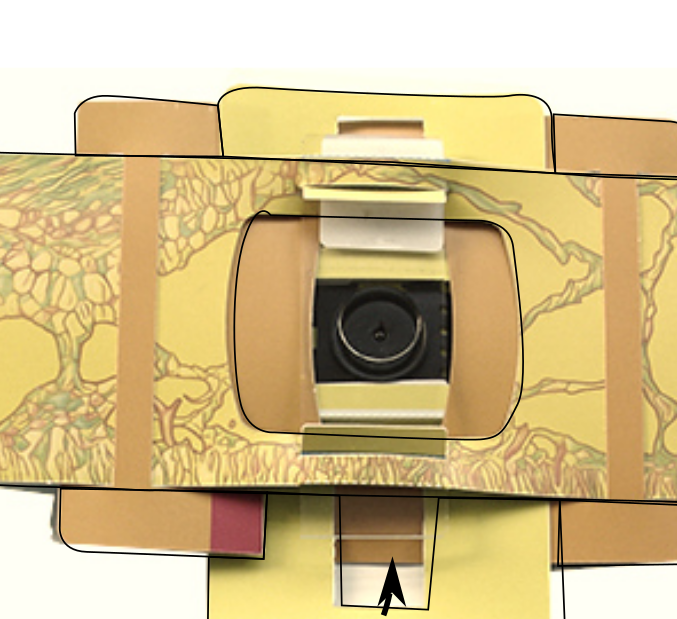
Insert your slide into the Foldscope as below (be careful slotting it in not to push your PDMS slab or coverslip away)
Cover slip Tip
We found using the re-useable glass slide and the included clear plastic sticker coverslips work really well even with thicker slabs. They are in the Foldscope plastic bag and you can peel them off; bend the backing sheet so you can lift off a corner of the clear coverslip stickers, then use tweezers to place over your slab and algae suspension and seal them in.
You can still lift up the sticker and add water if the suspension starts to dry up
Algae death
You will find that the longer you use the slide our Eugelena will start to move slowly as the water suspension dries up, eventually killing our collaborators. There is not too much to do about this and for us it brings up close, the issue in much experimental biology and indeed biotic gaming, what are the ethics of observing, using, and killing model organisms? For uni-cellular life like algae with no complex nervous system it’s a difficulty one can learn to accept, but we should think about what does it take for one organism to use another as a model, and for which organisms would this be unacceptable.
You can keep them alive longer by adding water or drop used slabs and coverslip stickers in a jar of water and left in sunlight occasionally allowing gas to exchnage they will happily multiply asexually and eventually form green algal blooms if you’re lucky!
Waste and death of organisms takes place on a vast scale in microbiology, made worse by contemporary practices of often essential asceptic technique that use throw away plastic tips and tubes and petri dishes (which we use in our kit). Years ago re-useable glass was so much part of microbiological practice that every biology department had an in-house glass blower and it meant disinfecting and cleaning equipment was as important as inoculation. Crucially this is a part of the culture of re-use and care so important to the life sciences, that we could be losing.
Get Exploring
That’s it! You’re ready! Now setup your phone with the Foldscope as above and see if our algal friends have found their way into the microfluidic channels. We’ve found that the vinyl record is the most rewarding, as you really get to see our Euglena gracilis moving along the grooves and you could try imagine how slow the music might sound like at their speed. With your phone setup you could try shining the LED included and see how they respond.
These organisms are mixotrophic in that they ‘eat’ proteins and plant matter but also photosynthesise, so like plants ‘make’ food from sunlight. They are like plants but also behave like animals.
Have a think what other ordinary stuff we have in our homes and workplaces that might have tiny spaces the size of record grooves or silicon chip logos? What about textiles? The surface of your phone or pair of running shoes/trainers/sneakers? An old pair of headphones? The surface of some wood or steel? Once you put yourself in the Algae’s position the human engineered world becomes like a whole world.
You begin to realise the most ordinary stuff in our human engineered world is full of vast precision engineered space and constructions, weird artefacts of utility that at some point took alot of human care and often untold human and non-human cost
Share Your Experience
Please post your images to twitter and copy @CriticalKits and @PrakashLab or Instagram @cheapjack @foldscope
Taking part further
Finally if you’d like to take part in the CriticalKits research project please contact Ross Dalziel
Other Materials
You might like to try using other materials. One tip for making moulds on big surfaces that dont fit a little petri dish is to use rolled up plasticine to make tiny ‘walls’ for your mould, if you try paint the PDMS on, it just spreads too thinly otherwise!
Ideally you want little PDMS ‘slabs’ of 0.25mm thickness or less.
Inventory
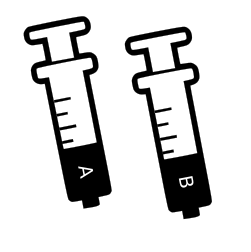
Prepared & labelled syringes filled with PDMS (A) & hardener (B). PDMS is a non-volatile silicon and safe to handle, but not ingest. We advise taking care to wash your hands thoroughly after use and store them in the already open plastic sleeves. Unmixed they store for up to a year. Be careful not to cross contaminate the A & B components or they will harden in storage.
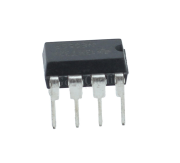
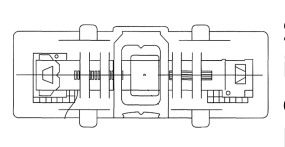
555 Timer chip. Common chip in maker projects. See https://github.com/DoESLiverpool/WearableTechBadgeWorkshop/blob/master/555Tutorials.md for what you can make with timers.

Micro-petri-dish with lid. Mix PDMS together and make impressions with chip surfaces. You could use anything you think might make tiny impressions in the surface of your PDMS mould.
1.5ml Eppendorf with safe-lid containing an algae suspension of Euglena gracilis. You can see Euglena in action here

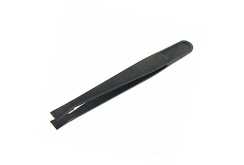
Vinyl fragment. Some of you may not remember, but at the dawn of pop culture and capitalism music was distributed widely on vinyl discs as micrometre scale grooves that could be amplified and played back
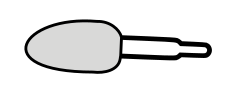
1.3ml Disposable micro pipette
Blank glass Microscope slide for use with the cover slip stickers
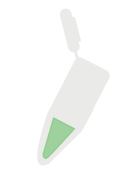
Plastic tweezers for removing your set PDMS impressions
Standard Foldscope classroom kit, instructions, sticker set, lens cleaning q-tip, lighting stage and lens/phone assembly
Pre-prepared stained slide for reference and testing.
Vinyl record Fragment. Some of you may not have a record collection and listen on big data infrastuctures like Spotify or YouTube or maybe if you care about artists getting paid, Bandcamp. You can’t really get impressions from these sources although if you could access their server racks in the correct data centre you could find a hard drive that likely has some micro-engineered structures but you’d get in trouble!
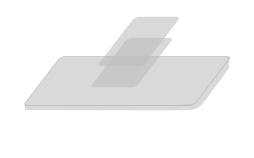
Cover slip stickers
Ring stickers for fixing the ‘scope to your phone camera