DigitalMigrations
Audiobending Images
Hack images by turning their raw data into sound, adding special effects.
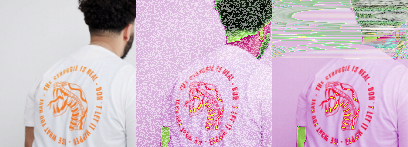
- Convert your image into an uncompressed image format, such as
.bmpor.tiff. As.jpgsand other popular formats are compressed data there’s more chance of completely breaking the image format, rather than ‘hacking’ it. -
Tools to convert: GIMP or Imagemagick or your favourite image editor like Adobe Photoshop or the Native Windows photoeditr and convert it to an uncompressed format like
.bmp. This stands for bitmap which maps a pixel to a position in x, y and a colourspace, so its a ‘map’ of ‘bits’ of data. -
Download Audacity. You don’t need the lame plugin as we wont be exporting to mp3, though grab it if you plan to use it for that feature in the future.
- Open Audacity and select
File > Import > Raw Dataand select your uncompressed.bmpfile. What you’ll now be presented is with options on how to import this raw data
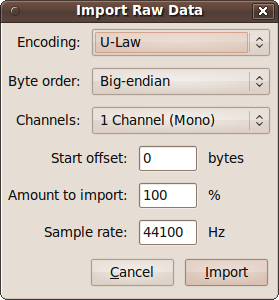
- Under
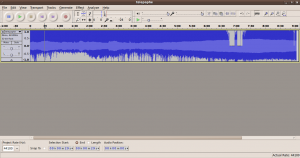
Encodingyou’ll need to select eitherU-LaworA-Law(remember which one you choose). When you choose any other format you’ll be converting the data into that format. Whilst you want to achieve data modification this is bad because it’ll convert the header of the image file, thereby ‘breaking’ the image format.U/A-Lawjust imports the data without adding an audio header. When you’re ready press Import and you’ll see your image as audio data, in this case it’s another graph of the waveform of the data, withtimeon thexaxis (Left to Right) and amplitude, which effectively means volume for a range of frequencies, on theyaxis (up & down).
-
Press play and it’ll probably sound like structured white noise or experimental electronic sound.
-
Select everything from about 2 to 4 seconds into the audio. This is to avoid the header we talked about at the beginning or ‘head’ of the file. With practice you will see the change in structure of the waveform. Unless you know the size of the header and exactly where it ends, you can usually guess that it’s a second or so into the audio. The best way to find it out is to try it out!
-
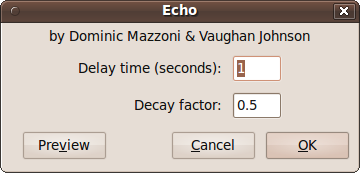
Highlight the section after the header and select
Effect > Echo. Leave the default settings as they are and press OK -
You’ll see that your audio has changed visually. It still wont sound any better!
-
Once you’re happy with your modifications select
File > Export. Choose a new location for your audiobent image. For us it’s best we useDigitalMigrations/docs/adventuresintext/imagesand type in the proposed new file name but don’t select save just yet. Choose a sensible name likeNameOfMyOriginalFileEcho.bmp. Next you’ll need to change the export settings to match the import settings.

- Change the file format to
Other Uncompressed Filesand then click on theOptionsbutton.
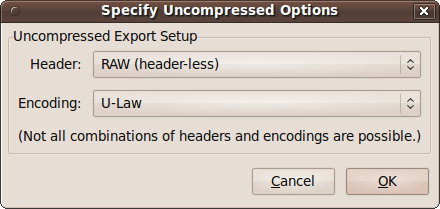
-
Change the settings to match the ones above (or to
A-Lawif you imported asA-Law). Now Save. If you entered a file extension when you were choosing a file name you’ll get a warning about the file extension being incorrect, but you can ignore it and continue. If you didn’t choose a file extension, when the file is finished exporting, add the appropriate extension to the file. In our case I’ll be adding.bmpto the end. -
Open the new file in your image editor and checkout the results!
-
Try applying different audacity effects on your files or re-process alread hacked images
-
Finally put the warped images into the Snorpey glitch web apps and see just how messed up you can get your images.
-
Then try presenting all your glitched images in the
adventurestintextwebpage prototype; just make sure you save all your warped images inDigitalMigrations/adventuresintext/imagesfolder so when you refer to their file names inDigitalMigrations/adventuresintext/main.jsthey will have the correct filePATHi.e. be in the right place when javascript tries to display them.